Showing posts with label Crafts. Show all posts

Thursday, April 19, 2012

Quick Art Project

Follow through is not one of my strengths.  I have good intentions on getting things done but, unfortunately, I have a lot of unfinished projects around.  Such as, the scarf I started knitting this winter and walls that I never finished painting. 

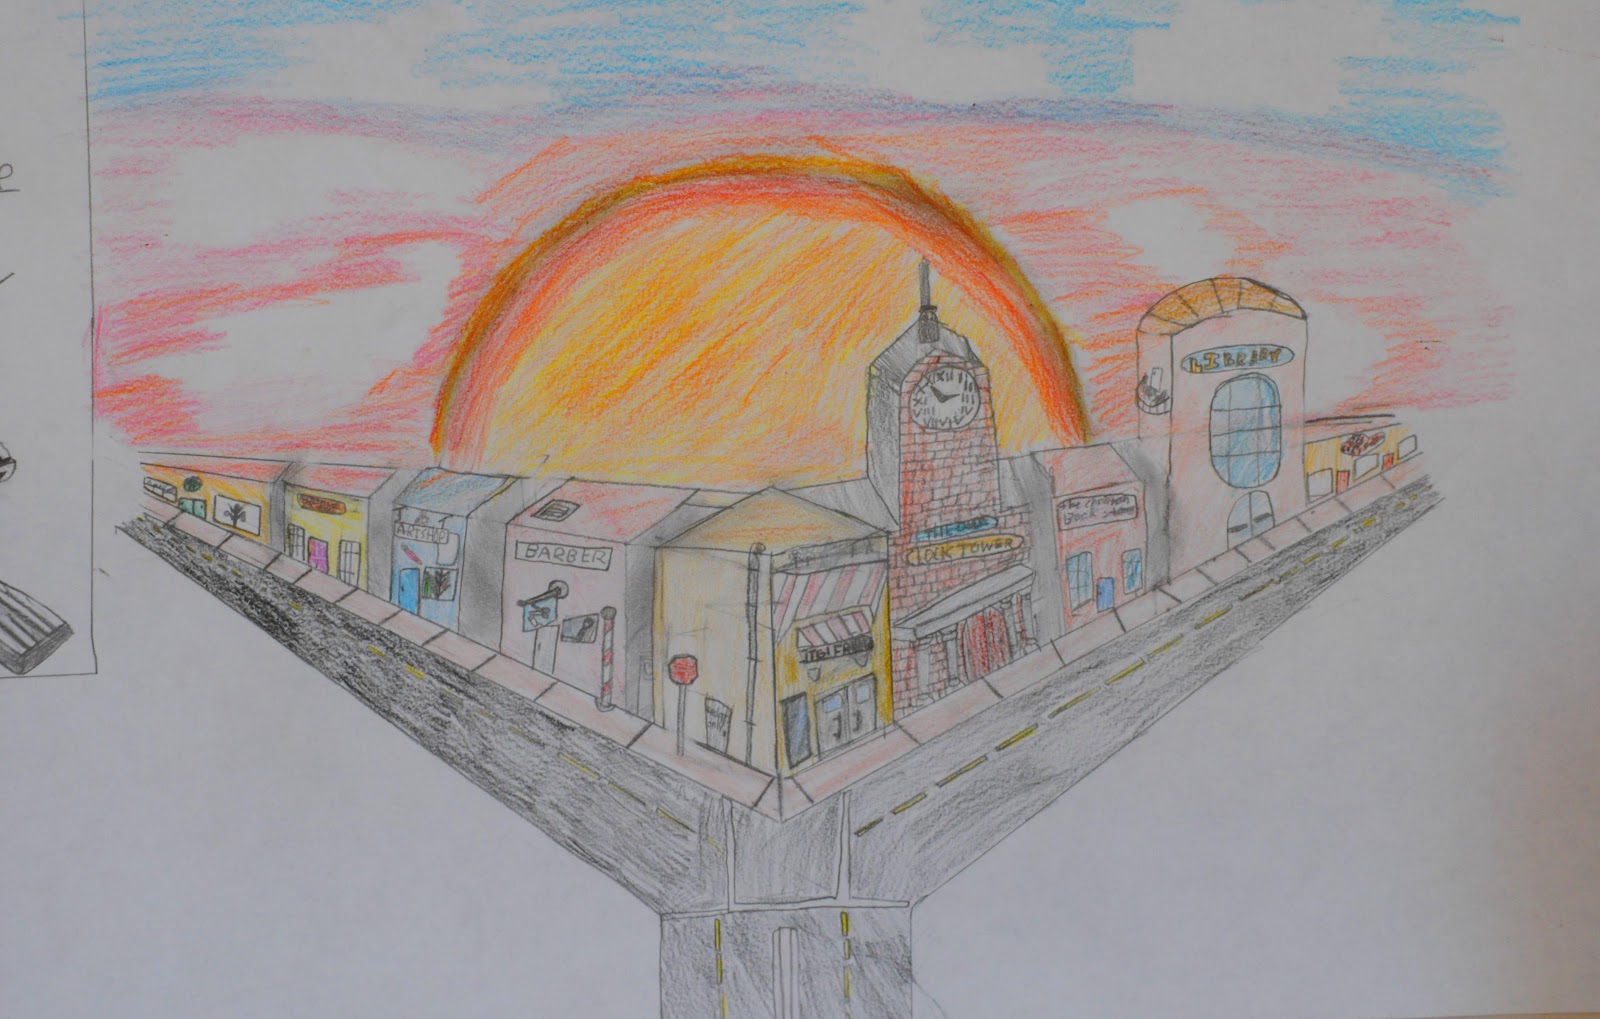
So when we started our art curriculum this year I fully intended on sticking with it until the end.  But...we fizzled out of it.  We chose a drawing course and we completed a few nice projects and learned some new techiniques like shading, texture, lines, etc.  We also learned how to draw one point perspective:

Jenna~


Jared~


Now that we don't have a curriculum to follow I was scrambling at the last minute to come up with an art project the other day.  I did a quick search and found instructions and templates for making comics.  It turned out to be a fun activity and Jared plans to continue making more. 


In case you can't see it, it says:
Hi, my name is Jared.
This is pretty much what I do most of the day. (Kid laying in bed, relaxing)
(Running) Yep, you heard me, 'most of the day'.  I said that because I'm homeschoo--
(Bang! Crashes into trashcan.) ...Uh...---schooled.

I found the templates and lots of other ideas at donnayoung.org and instructions and ideas for coming up with a story here.  Or, if you do a search in Google you can find lots of ideas.


Saturday, March 10, 2012

Our Melted Crayons

Hello Friends!

Spring is in the air and I'm so happy about it!  We have been pretty busy over here, lately.  We joined a Homeschool Co-op which meets weekly and the kids are lo-oving it, which = a happy mom.  We spend about 5 hours there and it is the highlight of my kid's week.  They both have classes (Jared: Human Anatomy, PE and Orchestra. Jenna: Zoology and Sewing) then we have our packed lunch.  After lunch the gym is open and the kids run around playing all sorts of organized games while us moms gab on the sidelines. 

Besides the new Co-op, we have our house on the market which = constant cleaning. *Yawn*.  I'm tired just thinking about all the cleaning I've done.  We have a routine in the morning of making beds and picking up bedrooms before we start school.  Friends, you are more than welcome to "drop by" ANYTIME, because my house is always clean!

We tackled a project that we'd never done before: melting down our old crayons.  This is something I've been planning to do for years, literally (which is why I HAVE to blog about it--ha!).  The kids tackled this one on their own since they were tired of waiting for me to get around to doing it!

So, we broke up our crayons into pieces and put them in my muffin tin (I recommend using an old one that you don't plan to use for muffins later because it's hard to get all the melted wax off when you're done).


This isn't the best picture (above) but I wanted to show you the condition our house was in when we got a call at 6:58pm for a house showing at 7:00pm.  Talk about panic.  My husband was just walking down the stairs from waking up after working 26 hours straight.  Crayon bits and labels covered the table and floor, no beds were made, dinner dishes were in the sink, etc.  I told them they could come see the house at 7:30, which was still crazy.  I went from room to room carrying around the container filled with crayons (above) because I didn't know where to put it and couldn't stop to think about it!  I guess it was a good drill for us because everyone ran around and we got the house picked up in time!

So, we then baked our crayon bits on 250 degrees for about 10-15 minutes.  They came out looking like this:


We put them in the refrigerator to cool for about 15-20 minutes and popped them out of the tins.  And they looked like this: 


What we'll do with them now, I have no idea.  The kids say they're too pretty to use.  

Tuesday, January 17, 2012

Potato Stamps

Along with our studies of American History this year, the kids are also learning about the US States.  We are going by geographical regions and working on memorizing the states and their capitals, using this website, which uses mnemonics.  Now that we're almost done, currently on the Rocky Mountain States, I found a book I'd completely forgotten I had, which incidently, a lot of these same mnemonics were taken from.  It's called "Kids Learn America":


It has lots of neat facts about each state, along with recipes, crafts, etc.  So, today we read about Idaho since it was one of our Rocky Mountain States.  One of the projects they suggest is to make potato stamps.  So, Jared and I decided to give it a try for fun!


First we carved out our shapes with a paring knife


Then dipped them in paint to make our pretty pictures


Here's Jared's finished project


It was a fun way to learn about a new state! 

Friday, January 13, 2012

Coming Up For Air

Phew!  Anyone else feel like they're being swallowed up with the everyday demands of life?  It never seems to slow down here...which is why I'm just now getting around to a new post for the first time in several weeks.

Ever since Thanksgiving school has been a challenge for us---and taking such a long break for Christmas only added to it!  I'm not sure if we will take such a long break next year.  I feel like we're moving in slow motion, trying to get back up to full speed.  We're getting there!  We are going to make a few changes in curriculum starting in the next couple of weeks.  I plan to order a new science program for Jenna, a couple of new bible studies and maybe a few other goodies.

We did have a nice, relaxing break, though.  I even learned how to knit!  Before my Grandmother passed away she left me a tub full of all of her knitting and crocheting supplies.  I have just about every size and style needle you could imagine.  So, here's my work in progress:


My very first stitches.  *Squeal* I had no plan other than to keep going once I figured it out.  So...it looks like it will be a scarf.  My #1 fan (Jared) is cheering me on each day.  He is so proud of his mama!  Every day he looks at the progress I've made and says, "Wow, Mom! That is SO cool!  When you finish it- I'm going to wear it."  I said, "But it's purple."  He replied, "I dont care! You made it, and that's all I care about."  Can kids be any sweeter??  So, my next project will be a beanie cap for him...not in purple though! Ha.

Tuesday, November 15, 2011

My Finished Project


I finally finished my first YoYo Quilt.  It was a little more tedious than I thought it would be but I'm happy with it!  I think I could actually get into quilting and may have an upcoming project for the winter.  I've never really been a quilt person, and definitely don't like the country look, but I think I might try a modern wall quilt.

That's all for today! 

Tuesday, October 18, 2011

What's New

Hello, blog world!  It's been a while. We have been plowing ahead in our homeschooling.  The kids are doing great. 

Along with our bible studies the kids have been memorizing bible verses each week and then presenting them to us at the end of the week.  So far they have had up to 2 verses in a week.  This week and next week they're doing much more and I'm so proud of them!  Jared will be memorizing John 15:1-11 and Jenna is working on 1 Corinthians 13 (the whole chapter).  I love to hear them reciting their verses---it makes my heart smile!

Here is a little glimpse of how Jared is doing (Jenna passed on the offer to let me record her). He has memorized John 15:1-4 so far.


We are so happy with Sonlight's literature.  We've really enjoyed each book that we've read so far and they're learning so much.

I've started a new project for the fall that I'm really excited about.  I'm making my first decorative yo-yo quilt (although it's technically not quilting at all).  I got the idea from my step mother-in-law when I saw hers the last time I visited.  I loved it so much that I knew I just HAD to try it.  Here are the fabrics I picked. I'm gong with a fall theme. 


I have them all cut into circles and I'm now making them into 2 inch yo-yo's.  Here are my first yo-yo's!


Once I'm finished making 42,000,000 of these (kidding) I will join them all together.  Can't wait to see how it turns out!

Wednesday, July 13, 2011

Good Smelling Fun

We've been inside trying to stay cool, doing a few experiments.  This time we made our own goop/slime.  I never knew how much fun the kids would get out of Elmers glue & Tide laundry detergent!  And, it smells good!

Check out all the fun we had:

Beards


It stretches


Jenna practicing her mind powers


It bounces


Love the face!


 I think you get the idea.  They had fun with this stuff.

**Side note: We first tried making this with RoseArt glue and Whisk detergent...didn't work.  Stick to the name brands for this one.


Tuesday, July 12, 2011

Two Things

I learned two things yesterday.

#1- I can scream like a rooster. 

Seriously.  Have your kid dash behind a car that's backing up in a parking lot and see if you can too.  It's amazing what can come out of you in a split second of panic. It sounded something like "OHJAREDJACARR!"

#2- Buying sidewalk chalk in the store really is the way to go.

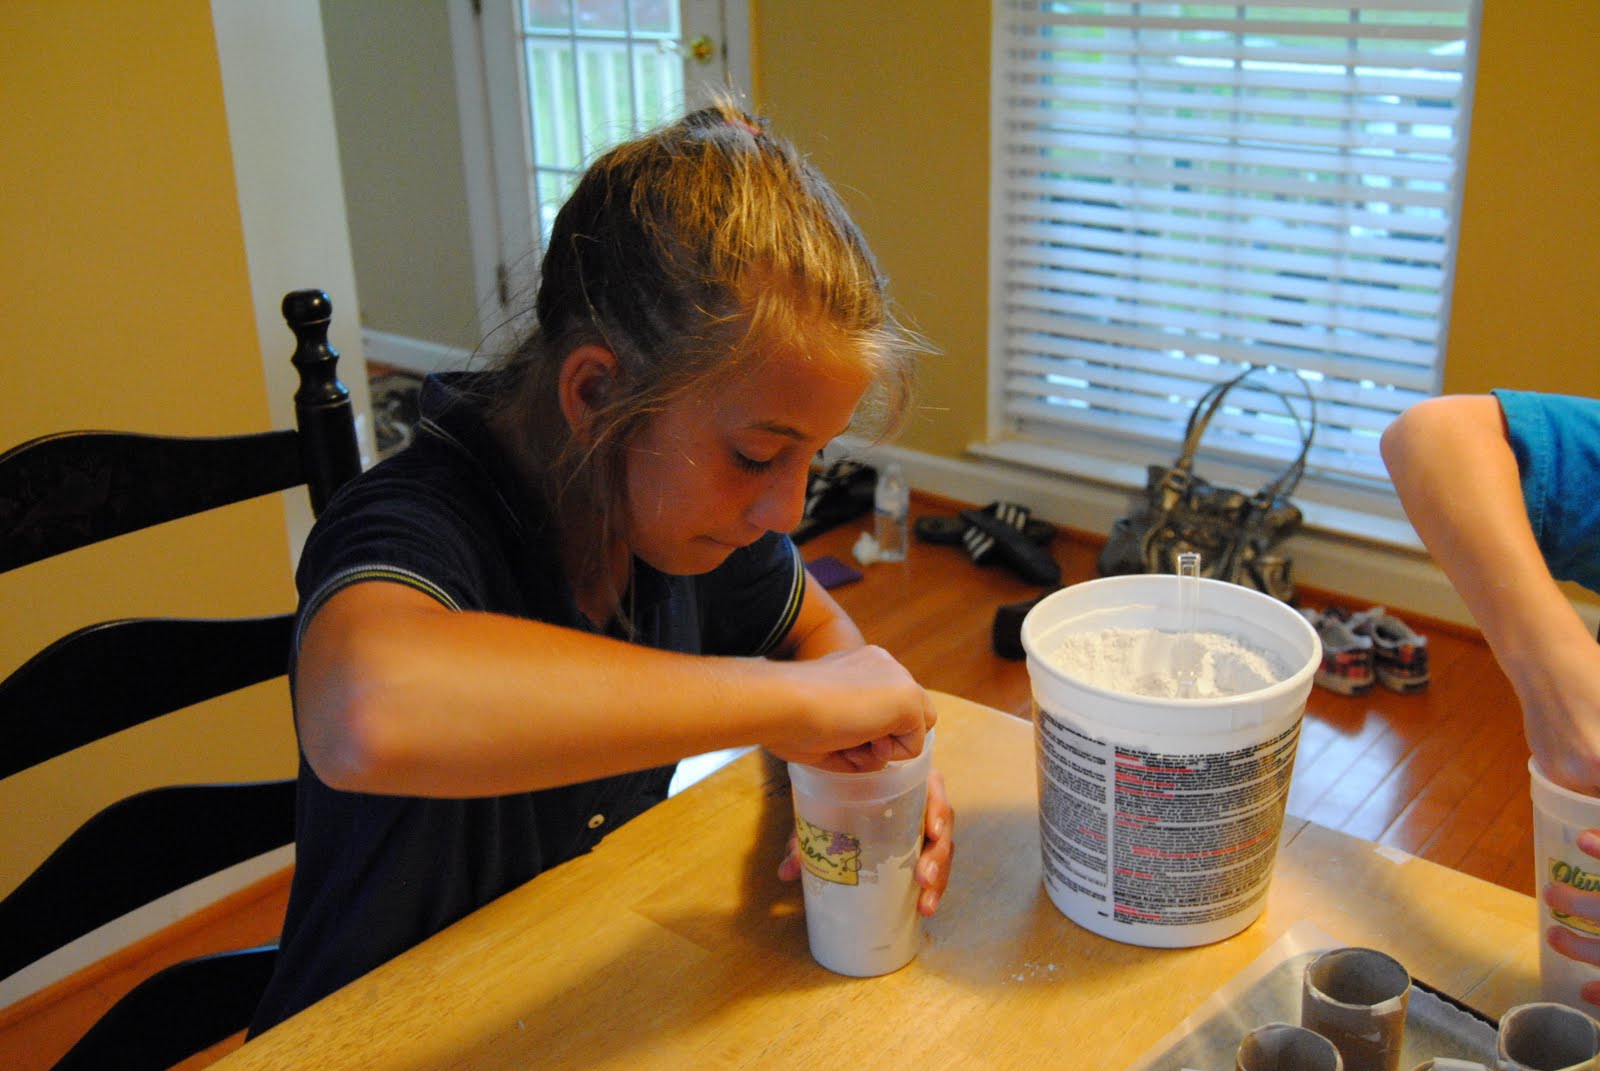
We decided to do an art project: making our own sidewalk chalk.  Wasn't as easy as I thought it would be. I realize it would have been cheaper and easier to just buy our own but we wanted to experience making it ourselves. We also learned about exothermic reactions when we noticed the mix was warm after pouring it.  Pretty cool.

The downside: people on the videos and tutorials I watched really made it look like a piece of cake.  Probably because they were all making ONE piece of chalk.  Was I over ambitious to think we could make TWELVE? Apparently so.

We stopped after making 6 sticks and 2 balls.  Here's how they came out.  Don't laugh.


If you'd like to try to make your own, here's how we did it.

You will need:
plaster of paris (I bought a 4 lb container)
wax paper
tape
plastic cups
plastic spoons for mixing
food coloring
toilet paper rolls
water
cookie sheet or covered surface

First, line your toilet paper rolls with wax paper.  Roll it up, slip it in and cut off excess. Tape to secure it.


Next, cover one end of the tube with scrap of wax paper.  Tape down.  This will be the bottom of your tube.


Repeat with all of your tubes, turn upside down and place on your cookie sheet.


Mix plaster of paris, water and food coloring.  You will have to play with the amounts. I never did get exact measurements.  Use about 8-10 heaping teaspoons of plaster and a little less than equal amount of water.  You want the consistency not to be runny, but not as thick as peanut butter.  You will get a feel for it when you try to pour it in your tube.  Add food coloring and mix well.  Pour into tubes immediately after mixing- it will harden fast!


As I mentioned above, you will notice the mixture becomes warm as it's turning into a solid.


Let dry for 24 hours.  Cut a slit in your tube and peel off wax paper. 

Have fun!

Tuesday, February 1, 2011

Valentine Tree


It's the time of year when we're stuck inside and become inspired to do fun crafts.  I found this idea on a blog recently and decided we had to give it a try.  The hardest part for me was finding branches! We only have baby trees around our house so we went on a search for these branches.  I spray painted them gray and then we made our little valentine ornaments for it.  We used felt, buttons, laces, rick rack, pearl beads, polyfill stuffing and let our imaginations do the rest.  I set the "tree" in a red pot and stuffed tissue paper around the base to keep them standing up.


Happy Valentine's Day!

Thursday, January 6, 2011

Fun Duct Tape Creations

There is a whole world that exists beyond ours. Have you discovered it? 

It's the world of duct tape.

Jenna has just begun delving into the seemingly never ending list of possiblities for creations. 

Her first project: Wallets


I even made one myself.  It's addciting!

You can get the different colors at the craft store or Walmart and let your imagination run wild.  If you google how to make them you will find scads of videos with instructions for wallets and other projects.